
During the last 2 months, I've watched a lot of cooking and food shows on Netflix. I caught up with watching many episodes from British Baking Show Master Class edition. This show has been the best instructional baking show I have ever seen, especially baking bread for me. I don't bake bread very often but I have read and watched many "how-to" articles and videos over the years about bread making or baking like everyone else, but the host Paul Hollywood's explanations in this show made it so much easier for me to get it right in so many ways.
For example, I never wanted to try making battery bread like this Danish, croissants or puff pastries since I know I'd most likely mess it up. But after watching Paul Hollywood making a danish loaf on the show and explains a few key points that I have never knew before, I was very comfortable with trying it out.
I want to point out one of the most important factor for successful baking - before I forget - is the confidence. Paul is a master baker and that comes with his confidence from years and years of baking, which makes "timing" part of his baking almost perfect. Most of us who aren't used to baking bread do not possess the skill of perfecting timing while bread making or baking.
Besides the timing resulting from experience, all these factors seem to be important; measurement, texture and temperature.
Firstly measurement. One reason why I'm not a good baker is because I'm rather lazy with measuring ingredients. To be honest here. I'm more like Jamie Oliver, just throw things in based on my pure instinct and luckily it usually turns out fine for savory dishes. BUT in baking, this is dangerous. After watching the show, I finally invested in a cooking scale. I felt so idiotic for not investing in a 10-doller electric cooking scale much sooner. A game changer! Should've bought one a looooong time go. Now I'm cooking more at home including bread, it's coming in real handy. If you don't have one, get one immediately. It saves you time and stress... and you'll most likely have much more successful cooking experiences if you own a cooking scale.
Secondly texture. I learned in one of the episodes that the texture of bread dough should be quit wet at first and you make it more solid by kneading the dough. My dough I made in the past using other people's recipes, often were much less wet than Paul demonstrated in the show and the results were often too hard or dry. So this makes sense. Like pasta, kneading patiently helps gluten to firm up dough. This is true with any dough made with flour. So this is definitely one of the most important things I leaned from the show.
Thirdly temperature. In most bread baking recipes with using instant yeast, it'd say to use warm or even hot water to activate the yeast faster. But Mr Hollywoood says to use room temperature water and just leave the dough proof longer to obtain better flavor. I paid attention to what he said here and practiced it when I made this danish and other bread. It works. Bread has stronger and better flavor. I really liked this tip. In the show, they have a fancy bread proofing compartment which most of us don't have in our kitchens. But the bottom line is it's better to proof the dough in a warm temperature. I sometimes leave it in my bathroom after we shower or in a sunny spot in our house.
After proofing the dough, the rest is relatively straight forward and easy. You carefully take air and air bubbles out, shape it and proof it again before baking on a baking tray.
For this recipe, I made a video for the fist time! My son is desperate to make some money to buy computer parts as a past of home schooling and I decided that I should use his help filming while I work on my recipe for the blog. I'm a photographer and never got into filming, but I do appreciate watching recipe videos, so here we go. This is an experiment for us and hopefully we get better quickly! You can watch it at the bottom of the photos before the recipe or click here to watch the video on YouTube.
Hope someone here be inspired to try out this recipe using the tips I learned from Mr. Hollywood if you haven't known them already!


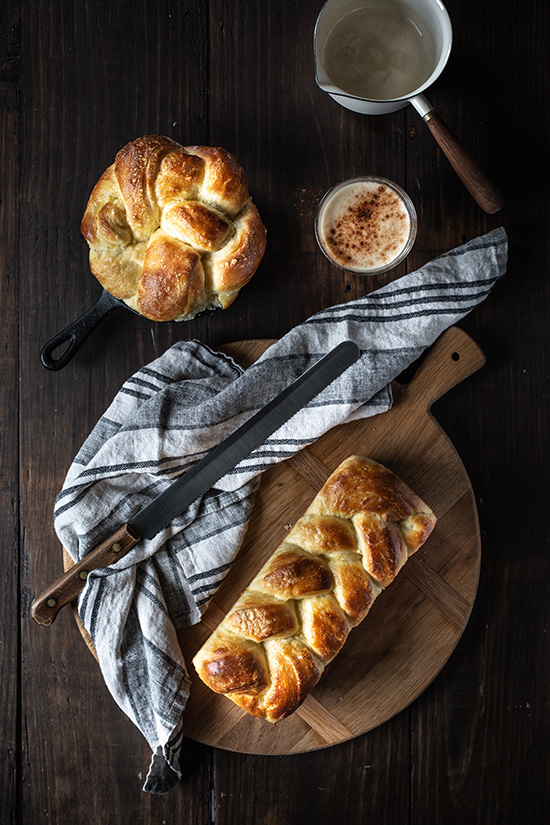
Simple Danish Loaf
Yield
10 slicesAuthor
Bella BonitoPrep time
2 H & 30 MCook time
30 MinTotal time
3 HourIngredients
- 200g of all purpose flour
- 6g of instant dry yeast
- 6g of salt
- 20g of sugar
- 24g of egg mixed (leave a little for bruising the dough later)
- 35g of whole milk
- a cup of water
- 100g of unsalted butter
Instructions
- In a bag, cut the butter in cubes and bang it into a flat sheet to place and fold in the dough later. Keep it in the fridge. Put all the dry ingredients in a large bowl and add milk. Add water to adjust the texture of the dough. The dough should be pretty wet and sticky. Knead the very wet dough until it is no longer sticky and forms into a ball. Shape it in a nice smooth ball shape. Put it in a large bowl, cover it with a plastic wrap and leave it until it becomes double the size for at least 1-2 hours.
- After the dough doubled the size, poke a hole. The dough is well proofed if the hole doesn't bounce back. Dust the board with flour and flatten the dough into a rectangle shape with a rolling pen about 1/4 inch or 1/2 cm thick, as it shows in the video. Place the sheet of butter onto half the dough and fold it in. Fold it in 3 layers and flatten the dough. Repeat it 3 times until the dough and butter are well combined. Don't worry if the butter spills over. Just dust it with some flour and carry on folding and flattening. Make the dough about 15inch or 40cm long and fold it into 3 layers. Cover it in a plastic wrap and rest it in the refrigerator for an hour.
- Dust the board and flatten the chilled dough into a rectangle about 10inch / 30cm long and 6 inch / 15cm wide. Cut it into 3 long strips.
- Pinch the top of the three strips together and start making a three strand braid by bringing one strip from outside over the strip in the center and repeat it from left to right until it's braided all the way. Tuck in or cut the edges to create a cleaner shape. Grease the pan with butter or spray oil, place the braided dough carefully in the pan. Leave it to proof (in a warm spot) at least it doubles the size for about an hour.
- Preheat the oven at 425ºF/220ºC. Brush the top of the Danish dough carefully with egg wash. Bake it for 10 minutes, then turn the oven down to 360ºF/180ºC and bake it for another 15-20 minutes. Take it out of the container right after taking out of the oven and let the bread cool down.
No comments
Post a Comment